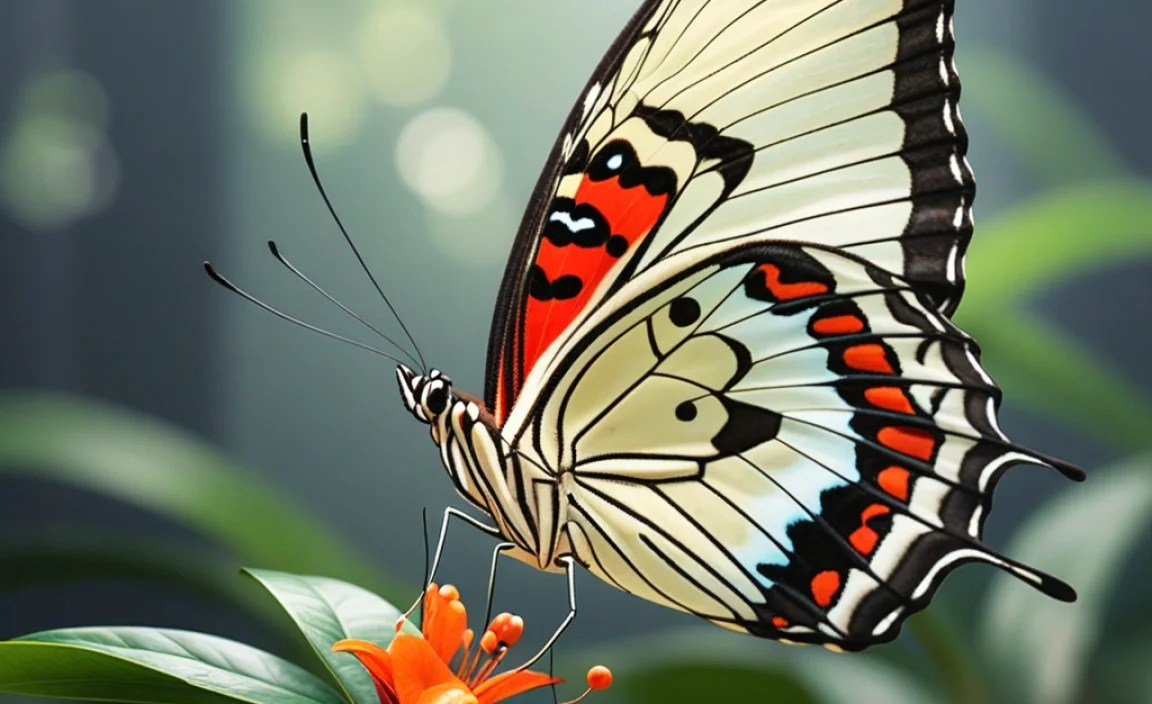
Asian Butterfly Photo Guide: Identify Exotic Species
Do you like butterflies? They are pretty and fly around. Many people like to take their picture. Have you ever tried? It can be tricky. This Asian butterfly photo guide will help you. It gives tips on how to take great pictures.
Taking photos of butterflies is fun. You can learn a lot too. You will see how they live. You will also see what they eat. Taking pictures helps you share them. Show your friends the cool butterflies you find.
Key Takeaways
- The Asian butterfly photo guide teaches you how to photograph butterflies well.
- Use a macro lens to get very close to the butterfly.
- Be patient and quiet, so you don’t scare the butterfly.
- Take photos early in the morning when they are still.
- Learn about butterflies to find them easily and understand their world.
Understanding Asian Butterfly Photography
Taking pictures of Asian butterflies can be a fun hobby. Asia has many different kinds of butterflies. Some are big and colorful. Others are small and harder to see. To take good pictures, you need to know some things. First, you need a good camera. A camera with a macro lens is best. This lets you take very close pictures. You also need to learn about butterflies. Where do they live? What do they eat? When are they most active? Knowing these things helps you find them. It also helps you take better pictures. Remember to be patient. Butterflies move a lot. You might have to wait a long time for the right shot. But it is worth it. A good picture can show how beautiful these creatures are. Always be respectful of nature. Do not disturb the butterflies or their habitat. Enjoy your butterfly photography!
- Use a camera with a macro lens.
- Learn about butterfly habitats.
- Be patient and quiet.
- Respect nature.
- Take lots of pictures.
When you are taking pictures, think about the light. The best light is early in the morning or late in the afternoon. The light is softer then. It will make your pictures look better. Avoid taking pictures in bright sunlight. The sun can make the colors look washed out. It can also create harsh shadows. Try to find butterflies in shady areas. This will give you better light. Also, think about the background. A blurry background can make the butterfly stand out. Use a wide aperture to blur the background. This will make your pictures look more professional. Most importantly, have fun. Butterfly photography is a great way to enjoy nature. It is also a way to learn about these amazing insects.
What Gear Do You Need?
To start taking great butterfly photos, you need some gear. What gear do you need? First, you will need a camera. A DSLR or mirrorless camera is best. These cameras let you change lenses. This is important for macro photography. You will also need a macro lens. A macro lens lets you focus very close to the butterfly. This will give you sharp, detailed pictures. A tripod can also be helpful. It will keep your camera steady. This is important when taking close-up pictures. A flash can also be useful. It can help you take pictures in low light. However, be careful not to scare the butterfly with the flash. Finally, you might want a butterfly net. This can help you catch butterflies. But be gentle! You don’t want to hurt them.
Where to Find Butterflies?
Where can you find butterflies? Butterflies like warm, sunny places. They often live near flowers. The flowers give them food. Look for butterflies in gardens. Also, look in parks and meadows. Butterflies also like forests. You can find them near streams and ponds. Different butterflies like different plants. Learn what plants attract butterflies. Then, you will know where to look. Some butterflies like milkweed. Others like butterfly bush. You can even plant these plants in your garden. This will attract butterflies to your yard. Remember to be patient. Butterflies can be hard to find. But if you keep looking, you will find them. And when you do, you can take their picture.
Best Time to Photograph Butterflies
When is the best time to take pictures? Butterflies are most active when it is warm. They like the sun. So, the best time is usually in the morning. They are warming up. They are not moving as fast. This makes it easier to take pictures. You can also take pictures in the afternoon. But it might be harder. The butterflies will be more active. They will be flying around. It is also good to take pictures on cloudy days. The light is softer. This can make the colors look better. Avoid taking pictures on windy days. The butterflies will be harder to find. They will be hiding from the wind. So, plan your photo trips for sunny or cloudy days. Go early in the morning or late in the afternoon.
Fun Fact or Stat: The most butterflies ever spotted in one location was 60 million during a migration in Mexico!
Essential Camera Settings for Butterflies
Using the right camera settings is important. It helps you take good pictures of butterflies. What are the best settings? First, use a wide aperture. This will blur the background. It will also make the butterfly stand out. An aperture of f/2.8 or f/4 is good. Next, use a fast shutter speed. This will freeze the butterfly’s motion. A shutter speed of 1/250 or faster is good. Also, use a low ISO. This will reduce noise in your pictures. An ISO of 100 or 200 is good. You might need to adjust these settings. It depends on the light. But these are good starting points. Remember to check your pictures. See if they are too dark or too bright. Adjust the settings as needed. With practice, you will learn the best settings for butterfly photography.
- Set a wide aperture (f/2.8-f/4).
- Use a fast shutter speed (1/250+).
- Keep ISO low (100-200).
- Adjust for lighting conditions.
- Check your photos and adjust.
- Consider using manual mode.
Focusing is also very important. Butterflies are small. It can be hard to focus on them. Use manual focus if needed. This will give you more control. Also, use focus peaking. This will show you what is in focus. Try to focus on the butterfly’s eyes. This will make the picture look sharper. Be careful when focusing. Butterflies can move quickly. You might need to refocus often. Practice makes perfect. The more you practice, the better you will get. Soon, you will be taking sharp, beautiful pictures. Remember to have fun and enjoy the process. It is a great way to connect with nature. It is also a way to learn about these amazing insects.
Aperture and Depth of Field
Aperture is very important. It controls the depth of field. What is depth of field? It is the area that is in focus. A wide aperture gives a shallow depth of field. This means that only a small area is in focus. This is good for butterfly photography. It blurs the background. It makes the butterfly stand out. A narrow aperture gives a large depth of field. This means that more of the picture is in focus. This is not usually good for butterfly photography. It can make the background distracting. So, use a wide aperture. An aperture of f/2.8 or f/4 is a good choice. Experiment with different apertures. See what works best for you. But remember, a wide aperture is usually best for butterfly pictures.
Shutter Speed and Motion
Shutter speed is important. It controls how much motion is captured. What is shutter speed? It is how long the camera’s sensor is exposed to light. A fast shutter speed freezes motion. This is good for butterfly photography. Butterflies move quickly. You want to freeze their motion. A slow shutter speed blurs motion. This is not usually good for butterfly photography. It can make the butterfly look blurry. So, use a fast shutter speed. A shutter speed of 1/250 or faster is a good choice. Experiment with different shutter speeds. See what works best for you. But remember, a fast shutter speed is usually best for butterfly pictures. It will keep your pictures sharp.
ISO and Image Noise
ISO is another important setting. It controls how sensitive the camera is to light. What is ISO? It stands for International Organization for Standardization. A low ISO gives a clean picture. It has less noise. Noise is like graininess in the picture. A high ISO gives a brighter picture. But it also has more noise. Noise can make the picture look bad. So, use a low ISO if you can. An ISO of 100 or 200 is a good choice. If it is dark, you might need to use a higher ISO. But try to keep it as low as possible. Experiment with different ISO settings. See what works best for you. But remember, a low ISO is usually best for butterfly pictures. It will keep your pictures clean and sharp.
Fun Fact or Stat: The smallest butterfly is the Western Pygmy Blue. Its wingspan is only about 0.5 inches!
Composition Tips for Butterfly Photos
Composition is how you arrange things in your picture. Good composition can make your pictures better. What are some tips? First, use the rule of thirds. Imagine your picture is divided into nine equal parts. Place the butterfly where the lines intersect. This will make the picture more interesting. Also, think about the background. Make sure the background is not distracting. A blurry background is often best. You can also use leading lines. These are lines that lead the eye to the butterfly. For example, a flower stem can be a leading line. Finally, think about the colors. Use colors that complement each other. This will make the picture more pleasing to the eye. With good composition, your butterfly pictures will look great.
- Use the rule of thirds.
- Keep the background simple.
- Use leading lines.
- Pay attention to colors.
- Fill the frame.
- Create a sense of depth.
Another important tip is to fill the frame. Get close to the butterfly. This will make it the main focus of the picture. But be careful not to scare it away. You can also create a sense of depth. Use different layers in your picture. For example, have some flowers in the foreground. Then have the butterfly in the middle ground. This will give the picture more dimension. Remember to take lots of pictures. The more pictures you take, the better your chances of getting a good one. And most importantly, have fun. Butterfly photography is a great way to enjoy nature. It is also a way to learn about these amazing insects. Keep practicing and you will improve.
The Rule of Thirds
The rule of thirds is a simple technique. It can make your pictures look better. What is the rule of thirds? Imagine your picture is divided into nine equal parts. There are two horizontal lines. There are also two vertical lines. Place the important parts of your picture where the lines intersect. For example, place the butterfly on one of the intersections. This will make the picture more balanced. It will also draw the viewer’s eye to the butterfly. The rule of thirds is not a hard rule. You don’t have to follow it every time. But it is a good guideline to start with. Experiment with different compositions. See what works best for you. But remember, the rule of thirds can help you create more interesting pictures.
Using Negative Space
Negative space is the empty space around the butterfly. It can be a powerful tool. It can help you draw attention to the butterfly. What is negative space? It is the area of the picture that is not the butterfly. It can be the sky, the background, or anything else. Use negative space to create balance. Place the butterfly off to one side. Then, fill the rest of the picture with negative space. This will make the butterfly stand out. It will also give the picture a sense of calm. Be careful not to use too much negative space. Too much space can make the picture look empty. Experiment with different amounts of negative space. See what works best for you. But remember, negative space can be a great way to improve your pictures.
Leading Lines in Nature
Leading lines can guide the viewer’s eye. They lead the eye to the butterfly. What are leading lines? They are lines in the picture that point to the butterfly. They can be natural lines, like flower stems. They can also be man-made lines, like fences. Use leading lines to create a sense of depth. Have the lines start in the foreground. Then, have them lead to the butterfly in the background. This will give the picture more dimension. Be careful not to have too many leading lines. Too many lines can be distracting. Experiment with different leading lines. See what works best for you. But remember, leading lines can help you create more interesting pictures. They draw the viewer into the picture.
Fun Fact or Stat: Butterflies taste with their feet! They have sensors on their feet to find food.
Lighting Techniques for Butterfly Photography
Lighting is very important. It can make or break your pictures. What are some lighting techniques? First, use natural light. The best light is usually early in the morning or late in the afternoon. The light is softer then. It will make the colors look better. Avoid taking pictures in bright sunlight. The sun can create harsh shadows. If you have to shoot in bright sunlight, try to find shade. You can also use a reflector. A reflector bounces light back onto the butterfly. This will fill in the shadows. You can also use a flash. But be careful not to scare the butterfly. Use a diffuser to soften the flash. With good lighting, your butterfly pictures will look amazing.
- Use natural light.
- Avoid direct sunlight.
- Use a reflector to fill shadows.
- Use a flash with a diffuser.
- Shoot during the golden hours.
- Find shade on sunny days.
Another tip is to shoot during the golden hours. The golden hours are the hours after sunrise and before sunset. The light is warm and soft during these times. It will make your pictures look beautiful. Also, pay attention to the direction of the light. Side lighting can create interesting shadows. Backlighting can create a silhouette. Experiment with different lighting angles. See what works best for you. Remember to take lots of pictures. The more pictures you take, the better your chances of getting a good one. And most importantly, have fun. Butterfly photography is a great way to enjoy nature. It is also a way to learn about these amazing insects. Keep practicing and you will improve.
Golden Hour Photography
The golden hour is a special time. It is the hour after sunrise. It is also the hour before sunset. The light is warm and soft. It makes everything look beautiful. Why is it called the golden hour? The light has a golden color. This is because the sun is low in the sky. The light travels through more of the atmosphere. This scatters the blue light. It leaves the warm colors. These warm colors make the pictures look amazing. Try to take pictures during the golden hour. You will be amazed at the results. The light is perfect for butterfly photography. It will make your pictures look professional. So, set your alarm and get out there!
Using Reflectors Effectively
A reflector can be a useful tool. It can help you improve your pictures. What is a reflector? It is a piece of material that reflects light. It can be white, silver, or gold. White reflectors give a soft, natural light. Silver reflectors give a brighter, cooler light. Gold reflectors give a warm light. Use a reflector to fill in shadows. Place the reflector opposite the light source. This will bounce light back onto the butterfly. It will make the shadows lighter. Be careful not to use too much reflection. Too much light can make the picture look unnatural. Experiment with different reflectors. See what works best for you. But remember, a reflector can help you create better pictures.
Diffusing Harsh Sunlight
Harsh sunlight can be a problem. It can create harsh shadows. It can also wash out the colors. What can you do about it? Use a diffuser. A diffuser is a piece of material that scatters light. It softens the light. It reduces the shadows. You can buy a diffuser. Or, you can make your own. Use a piece of white fabric. Hold the diffuser between the sun and the butterfly. This will soften the light. It will make the colors look better. Be careful not to block too much light. You still need some light to take the picture. Experiment with different diffusers. See what works best for you. But remember, a diffuser can help you take better pictures in harsh sunlight.
Fun Fact or Stat: Some butterflies migrate thousands of miles each year, just like birds!
Patience and Approach Techniques
Patience is very important for butterfly photography. Butterflies are small and fast. They can be hard to photograph. You need to be patient. Wait for the right moment. Don’t rush. Also, approach slowly. Don’t scare the butterfly. Move slowly and quietly. Wear clothes that blend in. Bright colors can scare the butterfly. Also, learn about butterfly behavior. When are they most active? What do they eat? Where do they live? Knowing these things will help you find them. It will also help you approach them. With patience and the right approach, you can get great pictures.
- Approach slowly and quietly.
- Wear neutral colors.
- Learn butterfly behavior.
- Be patient.
- Move deliberately.
- Avoid sudden movements.
Another tip is to move deliberately. Don’t make sudden movements. This will scare the butterfly. Instead, move slowly and smoothly. Also, avoid making noise. Butterflies are sensitive to sound. Loud noises can scare them away. If you are taking pictures with a friend, talk quietly. Also, be respectful of the environment. Don’t step on plants. Don’t disturb the butterfly’s habitat. Remember, you are a guest in their home. With patience and respect, you can take amazing pictures of butterflies. It is a rewarding experience. It is a great way to connect with nature. Keep practicing and you will improve.
Understanding Butterfly Behavior
Butterflies are interesting creatures. They have unique behaviors. Understanding these behaviors can help you. It helps you take better pictures. What do butterflies do? They fly around. They feed on nectar. They lay eggs. They also rest. Learn when butterflies are most active. Some butterflies are active in the morning. Others are active in the afternoon. Learn what plants butterflies like. This will help you find them. Also, learn how butterflies react to danger. They will fly away if they feel threatened. Be aware of your surroundings. Avoid making sudden movements. With knowledge of butterfly behavior, you can improve your photography.
The Art of Slow Movement
Slow movement is key. It is important for approaching butterflies. Why is slow movement important? Butterflies are easily scared. They will fly away if you move too quickly. Slow movement helps you avoid scaring them. Move slowly and deliberately. Avoid sudden movements. Take your time. Don’t rush. Also, be aware of your surroundings. Watch where you are stepping. Avoid stepping on plants. Be respectful of the environment. With slow movement, you can get closer to butterflies. You can take better pictures. It takes practice. But it is worth it. Slow movement is an art. Master it and you will become a better photographer.
Blending into the Environment
Blending into the environment is helpful. It can help you get closer to butterflies. How can you blend in? Wear neutral colors. Avoid bright colors. Bright colors can scare butterflies. Also, move slowly and quietly. Avoid making noise. Butterflies are sensitive to sound. Be aware of your surroundings. Watch where you are stepping. Avoid stepping on plants. Be respectful of the environment. Try to become part of the landscape. This will help you get closer to butterflies. It will help you take better pictures. It takes practice. But it is worth it. Blending into the environment is a valuable skill. It will make you a better photographer.
Fun Fact or Stat: A group of butterflies is sometimes called a flutter!
Post-Processing Tips for Butterfly Photos
Post-processing is what you do after you take the pictures. It can help you make your pictures even better. What are some post-processing tips? First, adjust the exposure. Make sure the picture is not too dark or too bright. Also, adjust the contrast. This will make the colors pop. Next, adjust the white balance. This will make the colors look more accurate. You can also sharpen the picture. This will make it look more detailed. Be careful not to over-sharpen. This can make the picture look unnatural. Finally, you can remove any distractions. This can be anything that takes away from the butterfly. With post-processing, you can make your butterfly pictures look amazing.
| Adjustment | Purpose | Tips |
|---|---|---|
| Exposure | Correct brightness | Adjust until the butterfly is well-lit. |
| Contrast | Enhance color and detail | Increase slightly to make colors pop. |
| White Balance | Correct color tones | Use the eye dropper to select a neutral color. |
| Sharpening | Improve detail | Sharpen gently to avoid artifacts. |
- Adjust exposure and contrast.
- Correct white balance.
- Sharpen the image.
- Remove distractions.
- Crop the image.
- Adjust saturation.
Another tip is to crop the image. This will help you focus on the butterfly. It will also remove any distractions. You can also adjust the saturation. This will make the colors more vibrant. Be careful not to over-saturate. This can make the colors look unnatural. Remember to save your work. Save your pictures in a high-quality format. This will preserve the detail. Also, back up your pictures. This will protect them from loss. With post-processing, you can take your butterfly pictures to the next level. It is a valuable skill. It will make you a better photographer. Keep practicing and you will improve.
Basic Adjustments in Photo Editors
Photo editors are useful tools. They can help you improve your pictures. What are some basic adjustments? You can adjust the exposure. This will make the picture brighter or darker. You can adjust the contrast. This will make the colors more vibrant. You can adjust the white balance. This will make the colors more accurate. You can also sharpen the picture. This will make it look more detailed. These are just some basic adjustments. There are many other things you can do. Experiment with different adjustments. See what works best for you. But remember, photo editors can help you create better pictures.
Removing Distractions Effectively
Distractions can ruin a good picture. They take away from the main subject. How can you remove distractions? Use a photo editor. Most photo editors have tools for removing distractions. You can use the clone stamp tool. This tool lets you copy part of the picture. Then, you can paste it over the distraction. You can also use the healing brush tool. This tool automatically blends the copied area. This makes the repair look more natural. Be careful not to overdo it. Too much editing can make the picture look unnatural. Experiment with different tools. See what works best for you. But remember, removing distractions can improve your pictures.
Color Correction and Saturation
Color is important in photography. It can affect the mood of the picture. It can also draw the viewer’s eye. How can you correct the colors? Use a photo editor. You can adjust the white balance. This will make the colors more accurate. You can also adjust the saturation. This will make the colors more vibrant. Be careful not to over-saturate. This can make the colors look unnatural. Also, pay attention to the color temperature. Warm colors are red, orange, and yellow. Cool colors are blue, green, and purple. Experiment with different color settings. See what works best for you. But remember, color correction can improve your pictures.
Fun Fact or Stat: Butterflies have four wings, not two, and they are covered in tiny scales!
Summary
Taking great photos of Asian butterflies is fun. It takes practice and patience. You need to use the right gear. A macro lens is very important. You need to understand camera settings. Aperture, shutter speed, and ISO are key. Composition is also important. Use the rule of thirds. Pay attention to lighting. Natural light is best. Finally, post-processing can help. Adjust exposure and contrast. Remove distractions. This Asian butterfly photo guide gives you the basics. Keep practicing and you will improve. Enjoy your butterfly photography!
Conclusion
Photographing Asian butterflies is rewarding. You learn about nature. You see beautiful creatures up close. Use this Asian butterfly photo guide. Practice the tips and techniques. Be patient and respectful. With time, you will take amazing photos. Share your photos with others. Inspire them to appreciate nature too. Enjoy the journey!
Frequently Asked Questions
Question No 1: What is the best camera for butterfly photography?
Answer: The best camera is one with a macro lens. This allows you to take close-up pictures. A DSLR or mirrorless camera is a good choice. These cameras let you change lenses. Look for a camera with good image quality. Also, consider the camera’s size and weight. You will be carrying it around. A lighter camera is easier to handle. This Asian butterfly photo guide recommends cameras with good macro capabilities. They help you capture the details of butterflies.
Question No 2: What settings should I use on my camera?
Answer: Start with a wide aperture. This will blur the background. An aperture of f/2.8 or f/4 is good. Use a fast shutter speed. This will freeze the butterfly’s motion. A shutter speed of 1/250 or faster is good. Use a low ISO. This will reduce noise. An ISO of 100 or 200 is good. Adjust these settings as needed. It depends on the light. Check your pictures and adjust. This Asian butterfly photo guide suggests experimenting. Find the best settings for each situation.
Question No 3: How do I get close to butterflies without scaring them?
Answer: Approach slowly and quietly. Wear neutral colors. Avoid bright colors. Learn about butterfly behavior. When are they most active? What do they eat? Where do they live? Move deliberately. Avoid sudden movements. Be patient. Wait for the right moment. This Asian butterfly photo guide emphasizes patience. It helps you get close to butterflies. Respect their space and movements.
Question No 4: What is the best time of day to photograph butterflies?
Answer: The best time is usually in the morning. Butterflies are warming up. They are not moving as fast. This makes it easier to take pictures. You can also take pictures in the afternoon. But it might be harder. The butterflies will be more active. It is also good to take pictures on cloudy days. The light is softer. Avoid taking pictures on windy days. The butterflies will be harder to find.
Question No 5: What are some good locations to find butterflies in Asia?
Answer: Asia has many great locations. Look for gardens and parks. Forests and meadows are also good. National parks often have butterflies. Research specific locations in your area. Some popular spots include butterfly farms. Also, botanical gardens are good. This Asian butterfly photo guide suggests checking local resources. Find the best places near you. Consider visiting during butterfly season.
Question No 6: How can I improve my butterfly photos in post-processing?
Answer: Adjust the exposure and contrast. Correct the white balance. Sharpen the image. Remove any distractions. Crop the image. Adjust the saturation. Use a photo editor. Experiment with different settings. Be careful not to overdo it. Too much editing can look unnatural. This Asian butterfly photo guide recommends subtle changes. Enhance the natural beauty of the butterfly. Make small adjustments to improve the photo.


