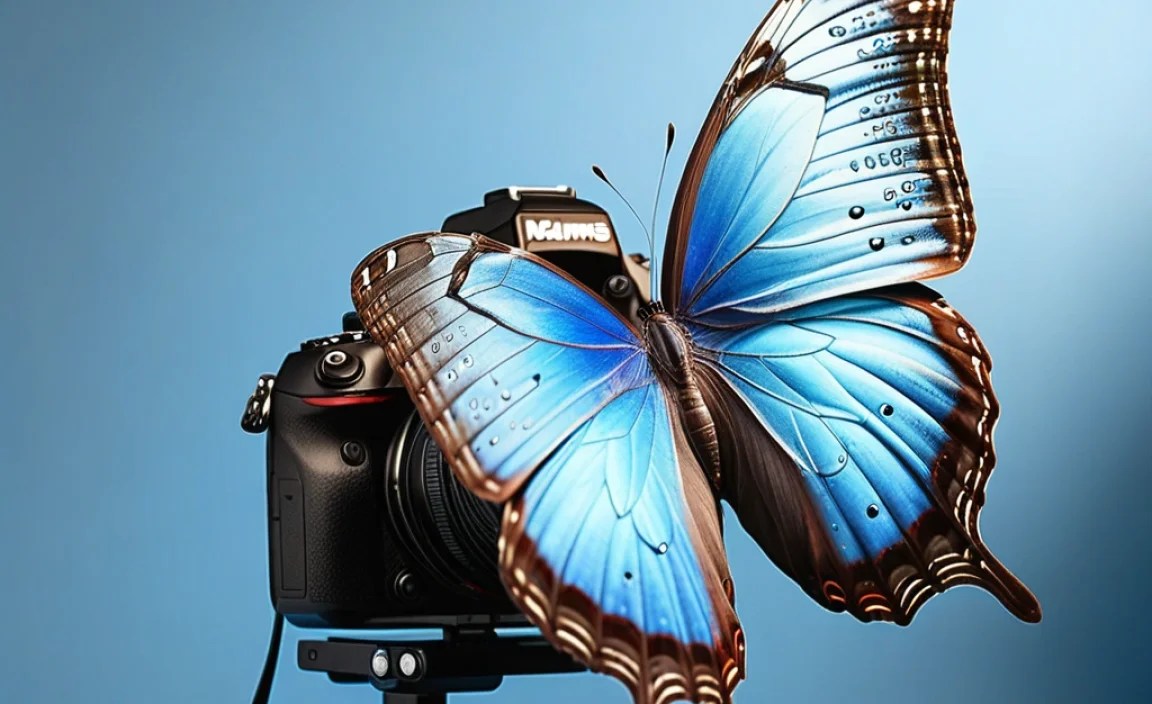
Blue Morpho Camera Settings: The Ultimate Guide
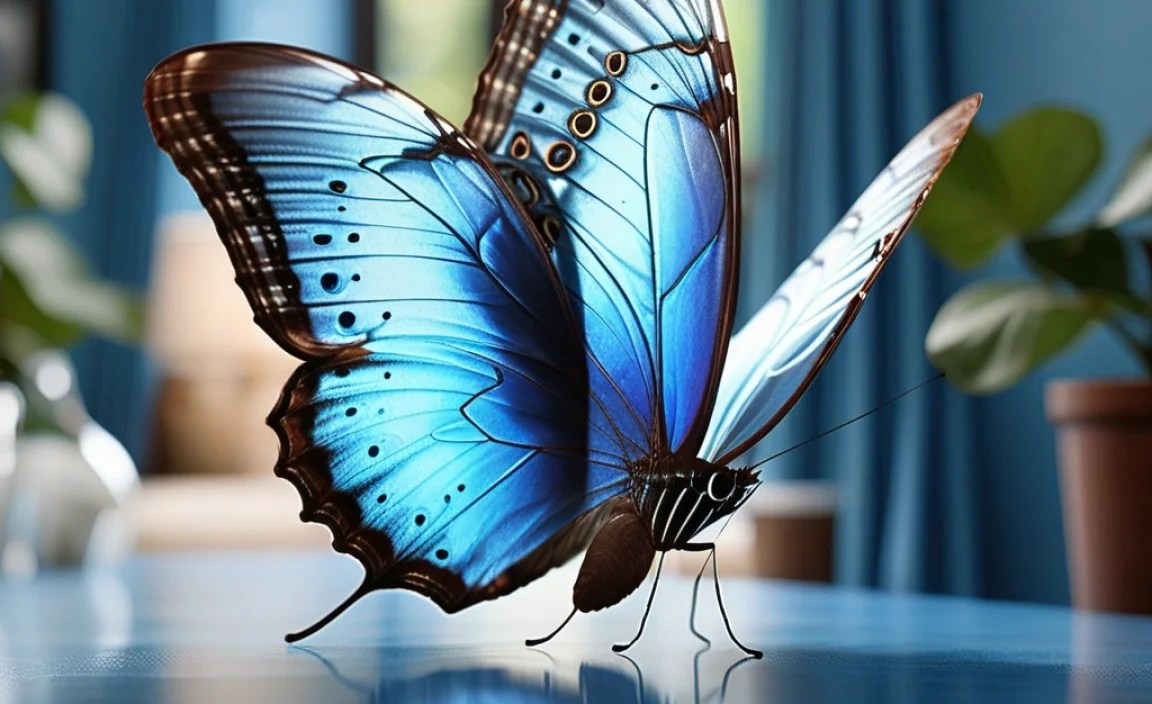
Have you ever seen a butterfly so blue it looks like magic? That might be a Blue Morpho. These amazing butterflies are famous for their bright blue wings. Taking photos of them can be tricky. You need to know the right Blue Morpho camera settings.
Why is it hard to photograph them? Their wings are super shiny. The light can bounce off in strange ways. But don’t worry! With the right tips, you can capture their beauty.
These butterflies live in rainforests. They are fast and don’t stay still for long. Knowing how to set your camera will help. You’ll get stunning photos of these blue beauties. Let’s learn how!
Key Takeaways
- Understanding Blue Morpho camera settings is key for clear photos.
- Use a fast shutter speed to freeze the butterfly’s quick movements.
- Aperture settings control the depth of field in your photos.
- ISO should be kept low to reduce noise in bright conditions.
- Consider using a macro lens for close-up, detailed shots.
Understanding Blue Morpho Camera Basics
Taking great photos of Blue Morphos starts with knowing your camera. What does each setting do? How do they work together? Understanding these basics helps a lot. You can then adjust settings for the best shots. Think of your camera as a tool. The better you know the tool, the better the results. Aperture controls how much light enters. Shutter speed controls how long the camera sees light. ISO adjusts the camera’s sensitivity to light. These three work together to create a good exposure. When photographing Blue Morphos, you will often need to adjust these quickly. They move fast. Light changes in the rainforest. Being comfortable with your camera lets you react to these changes. This will increase your chances of getting a perfect photo. Knowing your camera makes all the difference.
- Learn what aperture, shutter speed, and ISO do.
- Practice adjusting settings quickly.
- Understand how light affects your photos.
- Read your camera’s manual.
- Experiment with different settings.
To take great photos, you must practice. Try different settings in different lights. See how the photos change. The more you practice, the better you will get. Don’t be afraid to make mistakes. Mistakes help you learn. Photography is a journey. Enjoy the process of learning and improving. Each photo you take teaches you something new. Keep practicing, and you will take amazing photos. The Blue Morphos will be impressed!
Fun Fact or Stat: Blue Morpho butterflies have iridescent wings! This means the color changes depending on the angle of light.
What is Aperture?
Aperture is like the pupil of your eye. It controls how much light enters the camera. A wider aperture (smaller f-number like f/2.8) lets in more light. It also creates a shallow depth of field. This means only a small part of the picture is in focus. A narrow aperture (larger f-number like f/16) lets in less light. It creates a large depth of field. More of the picture is in focus. When photographing Blue Morphos, you might want a shallow depth of field. This will make the butterfly stand out from the background. But if you want the butterfly and its surroundings in focus, use a narrow aperture. Choosing the right aperture depends on the shot you want.
What Shutter Speed Should I Use?
Shutter speed is how long the camera’s sensor is exposed to light. A fast shutter speed (like 1/1000 second) freezes motion. It’s great for fast-moving subjects. A slow shutter speed (like 1/30 second) blurs motion. It’s good for showing movement. Blue Morphos move quickly. A fast shutter speed is important. This will freeze their wings. You don’t want blurry wings. But a fast shutter speed needs more light. You might need to increase ISO or widen the aperture. Finding the right balance is key. Practice using different shutter speeds to see what works best.
Understanding ISO
ISO measures how sensitive your camera is to light. A low ISO (like 100) is less sensitive. It produces cleaner images with less noise. A high ISO (like 3200) is more sensitive. It’s useful in low light. But it can create noisy images. Noise looks like grain in your photos. When photographing Blue Morphos, try to keep the ISO low. This will give you the best image quality. If you need more light, adjust aperture or shutter speed first. Only increase ISO if necessary. Balancing ISO with other settings is important. This will give you the best photos possible.
Choosing the Right Lens for Blue Morphos

The lens you use can make a big difference. Different lenses are good for different things. A wide-angle lens captures a lot of the scene. A telephoto lens lets you zoom in from far away. A macro lens lets you take close-up photos. For Blue Morphos, a macro lens is often the best choice. It lets you capture all the details of their wings. You can see the tiny scales and patterns. A telephoto lens can also be useful. This lets you photograph the butterflies from a distance. This won’t scare them away. Think about the type of shot you want. Then choose the right lens for the job. A good lens can help you take amazing photos.
- Consider a macro lens for close-up details.
- A telephoto lens can help from a distance.
- Wide-angle lenses are good for showing the environment.
- Prime lenses often offer better image quality.
- Experiment with different lenses to see what you like.
Lenses can be expensive. You don’t need the most expensive lens to take good photos. There are many affordable options that work well. Research different lenses and read reviews. Consider renting a lens before buying it. This lets you try it out and see if you like it. The most important thing is to practice with the lens you have. Learn its strengths and weaknesses. A skilled photographer can take great photos with any lens. Choose a lens that fits your budget and your needs. Then go out and start shooting! You can capture the beauty of Blue Morphos with any lens.
Fun Fact or Stat: Some lenses have image stabilization. This helps reduce blur caused by camera shake.
What is a Macro Lens?
A macro lens is designed for taking close-up photos. It lets you focus on very small objects. This is perfect for capturing the details of a Blue Morpho’s wings. You can see the tiny scales and patterns. Macro lenses have a high magnification ratio. This means that the object appears larger in the photo than it does in real life. Macro lenses often have a shallow depth of field. This means only a small part of the image is in focus. This can be useful for isolating the butterfly from the background. But it can also be tricky to get the entire butterfly in focus. Practice using a macro lens to get the best results.
Using a Telephoto Lens
A telephoto lens lets you zoom in from a distance. This can be useful for photographing Blue Morphos. You can stay far away and not scare them. Telephoto lenses have a long focal length. This means they magnify the image. Telephoto lenses can be heavy and bulky. They can also be more expensive than other lenses. But they are worth it if you want to photograph wildlife from a distance. When using a telephoto lens, it’s important to use a tripod. This will help keep the camera steady. This will reduce blur caused by camera shake. Practice using a telephoto lens to get the best results.
The Benefits of Prime Lenses
Prime lenses have a fixed focal length. This means they don’t zoom. Some photographers prefer prime lenses. Prime lenses are often sharper than zoom lenses. They often have wider apertures. This lets in more light. This is useful in low light situations. Prime lenses are often smaller and lighter than zoom lenses. This makes them easier to carry around. Prime lenses can be more affordable than zoom lenses. Some photographers like the challenge of using a prime lens. It forces them to think more about composition. Experiment with prime lenses to see if you like them.
Mastering Focus for Sharp Butterfly Photos

Focus is very important for sharp photos. If your photo is out of focus, it will look blurry. There are different ways to focus your camera. Autofocus lets the camera focus automatically. Manual focus lets you focus yourself. For Blue Morphos, autofocus can be tricky. The butterflies move quickly. The camera may have trouble locking focus. Manual focus can be more precise. But it takes practice. Learn how to use both autofocus and manual focus. Then you can choose the best method for each situation. Sharp focus is essential for capturing the beauty of Blue Morphos.
- Learn how to use autofocus and manual focus.
- Use single-point autofocus for precision.
- Focus on the butterfly’s eyes.
- Use focus peaking to help with manual focus.
- Practice focusing on moving subjects.
There are different autofocus modes. Single-point autofocus lets you choose one focus point. This is useful for focusing on a specific part of the butterfly. Continuous autofocus tracks the subject as it moves. This can be useful for photographing butterflies in flight. Experiment with different autofocus modes to see what works best. Practice focusing on moving subjects. This will help you improve your focusing skills. The more you practice, the sharper your photos will be. You can capture the amazing details of the Blue Morphos.
Fun Fact or Stat: Some cameras have focus peaking. This highlights the areas that are in focus.
Autofocus Techniques
Autofocus can be a great tool. But it’s important to know how to use it correctly. Make sure your camera is set to the correct autofocus mode. Single-point autofocus is often the best choice for butterflies. Choose a focus point that is on the butterfly’s eye. This will ensure that the eye is sharp. Use back-button focus. This separates focusing from the shutter button. This can give you more control over the focus. Practice using autofocus in different situations. This will help you become a better photographer.
Manual Focus Tips
Manual focus takes practice. But it can give you more control over the focus. Use the focus ring on your lens to adjust the focus. Look through the viewfinder or on the LCD screen. Turn the focus ring until the subject is sharp. Use focus peaking if your camera has it. This will highlight the areas that are in focus. Zoom in on the subject to check the focus. Practice manual focus on different subjects. This will help you improve your skills. With practice, you can master manual focus.
Focusing on Moving Butterflies
Focusing on moving butterflies can be tricky. Use continuous autofocus mode. This will track the butterfly as it moves. Use a fast shutter speed. This will freeze the motion of the butterfly. Use a wide aperture. This will let in more light. This will help the camera focus. Anticipate the butterfly’s movements. Try to predict where it will go next. Practice focusing on moving subjects. This will help you improve your skills. With practice, you can capture sharp photos of moving butterflies.
Using Natural Light to Your Advantage
Light is very important in photography. Natural light can create beautiful photos. But it can also be challenging to work with. The light changes throughout the day. It can be bright and harsh. It can be soft and diffused. Learn how to use natural light to your advantage. Pay attention to the direction of the light. Side light can create interesting shadows. Backlight can create a halo effect. Front light can illuminate the subject evenly. Experiment with different types of light. Find the light that works best for the shot you want. Good light can make your photos amazing.
- Shoot during the golden hour for soft, warm light.
- Use a diffuser to soften harsh sunlight.
- Look for open shade for even lighting.
- Pay attention to the direction of the light.
- Experiment with different types of light.
The time of day affects the light. The golden hour is the hour after sunrise and the hour before sunset. The light during the golden hour is soft and warm. It’s a great time to photograph butterflies. Midday light is often harsh and bright. It can create strong shadows. Try to avoid shooting in direct sunlight during midday. If you have to shoot in direct sunlight, use a diffuser. A diffuser softens the light. It reduces shadows. The right light makes all the difference.
Fun Fact or Stat: The golden hour is called that because the light has a golden color.
Shooting in the Golden Hour
The golden hour is a great time to photograph butterflies. The light is soft and warm. It creates beautiful colors. The shadows are long and interesting. Plan your shoot for the golden hour. Arrive early to set up your equipment. Be patient. The light changes quickly during the golden hour. Take lots of photos. Experiment with different settings. You can capture amazing photos in the golden hour. The Blue Morphos will look stunning in the soft, warm light. It’s worth waking up early or staying out late to shoot in the golden hour.
Working with Harsh Sunlight
Harsh sunlight can be challenging. It creates strong shadows. It can wash out colors. Try to avoid shooting in direct sunlight. If you have to, use a diffuser. A diffuser softens the light. It reduces shadows. Shoot in the shade. The shade provides even lighting. Use a reflector to bounce light onto the subject. This will fill in the shadows. Adjust your camera settings. Reduce the exposure to compensate for the bright light. Be patient. Wait for a cloud to pass over the sun. This will soften the light. You can still take good photos in harsh sunlight.
Finding Open Shade
Open shade is a great place to photograph butterflies. It provides even lighting. There are no harsh shadows. The colors are true and vibrant. Look for open shade near trees or buildings. Avoid shooting in deep shade. Deep shade can be too dark. Position the butterfly so that it is facing the light. This will illuminate the butterfly’s face. Adjust your camera settings. Increase the exposure slightly to compensate for the shade. Be patient. Wait for the butterfly to move into the perfect position. You can capture beautiful photos in open shade.
Composition Tips for Stunning Butterfly Photos

Composition is how you arrange the elements in your photo. Good composition can make a photo more interesting. It can draw the viewer’s eye to the subject. There are many different rules of composition. The rule of thirds is a popular one. Imagine dividing your photo into thirds. Place the subject at one of the intersections. This creates a more balanced composition. Leading lines can draw the viewer’s eye into the photo. Use natural elements like branches or streams. Fill the frame with the subject. This creates a sense of intimacy. Experiment with different compositions. Find what works best for you. Great composition can make your photos stand out.
- Use the rule of thirds for balanced compositions.
- Create leading lines to guide the viewer’s eye.
- Fill the frame to emphasize the subject.
- Use negative space to create a sense of calm.
- Experiment with different angles and perspectives.
Pay attention to the background. A cluttered background can distract from the subject. Try to find a clean background. This will make the butterfly stand out. Use a shallow depth of field. This will blur the background. This will help to isolate the butterfly. Consider the colors in the photo. Complementary colors can create a visually appealing image. For example, blue and yellow are complementary colors. Use these colors in your photos. Good composition takes practice. The more you practice, the better you will get. You can capture stunning butterfly photos with great composition.
Fun Fact or Stat: The rule of thirds is based on the Fibonacci sequence.
The Rule of Thirds
The rule of thirds is a simple but effective composition technique. Imagine dividing your photo into nine equal parts. Use two horizontal lines and two vertical lines. Place the important elements of your photo along these lines. Or at the intersections of these lines. This creates a more balanced and interesting composition. The rule of thirds is a guideline. It’s not a hard and fast rule. Feel free to break the rule of thirds. But it’s a good place to start. Experiment with the rule of thirds. See how it affects your photos. You can create more visually appealing images.
Using Leading Lines
Leading lines can draw the viewer’s eye into the photo. They can create a sense of depth. They can lead the viewer to the subject. Use natural elements like branches or streams. Use man-made elements like roads or fences. Position the leading lines so that they lead to the butterfly. Make sure the leading lines are sharp and in focus. Use a wide aperture to create a shallow depth of field. This will blur the background. This will help the leading lines stand out. Experiment with different leading lines. See how they affect your photos. You can create more dynamic and engaging images.
Filling the Frame
Filling the frame is a great way to emphasize the subject. Get close to the butterfly. Fill the entire frame with the butterfly. This creates a sense of intimacy. It allows the viewer to see all the details. Be careful not to cut off any important parts of the butterfly. Make sure the butterfly is sharp and in focus. Use a wide aperture to create a shallow depth of field. This will blur the background. This will help the butterfly stand out. Experiment with filling the frame. See how it affects your photos. You can create more impactful and memorable images.
Post-Processing Tips for Butterfly Photos
Post-processing is editing your photos after you take them. It can help you to improve the colors, contrast, and sharpness. It can also help you to remove distractions. There are many different photo editing programs. Adobe Photoshop and Lightroom are popular choices. There are also free options like GIMP. Learn how to use a photo editing program. Start with the basics. Adjust the exposure, contrast, and white balance. Sharpen the image. Remove any distractions. Be careful not to over-edit your photos. The goal is to enhance the photo, not to change it completely. Good post-processing can make your photos look their best.
- Adjust exposure, contrast, and white balance.
- Sharpen the image to bring out details.
- Remove distractions like dust spots.
- Correct lens distortion and chromatic aberration.
- Use selective adjustments to enhance specific areas.
Back up your photos before you start editing. This will protect you from losing your original images. Work on a copy of the photo. This will allow you to experiment without damaging the original. Save your edits as a new file. This will allow you to go back to the original if you don’t like the edits. Learn how to use layers in your photo editing program. This will allow you to make non-destructive edits. Experiment with different editing techniques. Find what works best for you. Post-processing is a powerful tool. Use it to enhance your butterfly photos.
Fun Fact or Stat: Post-processing used to be done in a darkroom with chemicals.
| Setting | Description | Benefit | Drawback |
|---|---|---|---|
| Exposure | Adjusts brightness | Brightens dark photos | Can overexpose bright photos |
| Contrast | Adjusts difference between light and dark | Makes photos more vivid | Can make photos look unnatural |
| White Balance | Adjusts color temperature | Corrects color casts | Can make photos look too warm or cold |
| Sharpening | Enhances details | Makes photos look sharper | Can create artifacts |
Basic Adjustments
Basic adjustments are the first step in post-processing. Adjust the exposure to brighten or darken the photo. Adjust the contrast to increase or decrease the difference between light and dark. Adjust the white balance to correct any color casts. These adjustments can make a big difference in the overall look of the photo. Use the histogram to guide your adjustments. The histogram shows the distribution of tones in the photo. The goal is to have a balanced histogram. This means that there are tones in all parts of the range. Avoid clipping the highlights or shadows. This means that there are no tones that are completely white or completely black. Basic adjustments are essential for good post-processing.
Sharpening Techniques
Sharpening can enhance the details in your photos. It can make them look sharper and more defined. But it’s important to sharpen carefully. Over-sharpening can create artifacts. These are unwanted distortions in the image. Use the sharpening tools in your photo editing program. Unsharp mask is a popular sharpening technique. Adjust the amount, radius, and threshold settings. Zoom in on the image to check the sharpness. Avoid sharpening areas that are already sharp. Sharpen the edges of the butterfly’s wings. This will make them stand out. Sharpening is a powerful tool. Use it to enhance the details in your butterfly photos.
Removing Distractions
Distractions can detract from the subject of your photo. Remove distractions in post-processing. Use the clone stamp tool to remove small distractions. Use the healing brush tool to remove larger distractions. Be careful not to remove anything that is important to the photo. Remove dust spots, scratches, and blemishes. Remove distracting elements in the background. Crop the photo to remove distracting elements. Pay attention to the details. Removing distractions can make a big difference in the overall look of the photo. The Blue Morpho will be the star of the show.
Summary
Photographing Blue Morphos can be a fun challenge. You need to understand your camera settings. A macro lens helps capture details. Fast shutter speeds freeze their motion. Good lighting and composition are key. Blue Morpho camera settings depend on the situation. Post-processing enhances your photos. Practice these tips. You will capture stunning images of these amazing butterflies. Always respect their habitat.
Conclusion
Photographing Blue Morphos is rewarding. It combines skill, patience, and respect for nature. Mastering camera settings is key. This includes aperture, shutter speed, and ISO. A good lens and composition also matter. Post-processing enhances the final image. Keep practicing and learning. You will capture amazing photos. Remember the tips about Blue Morpho camera settings. Go out and photograph these beautiful creatures!
Frequently Asked Questions
Question No 1: What are the best camera settings for photographing Blue Morphos in bright sunlight?
Answer: In bright sunlight, you’ll want to keep your ISO low, around 100 or 200. This will minimize noise. Use a fast shutter speed, like 1/500 or 1/1000 of a second, to freeze their movements. Set your aperture to f/8 or f/11 for good depth of field. This will ensure most of the butterfly is in focus. Remember, the key is balancing these settings for a properly exposed image. Also, consider using a polarizing filter to reduce glare on their wings.
Question No 2: How do I get sharp photos of Blue Morphos when they are constantly moving?
Answer: The key to sharp photos of moving Blue Morphos is a fast shutter speed. Aim for 1/500 of a second or faster. Use continuous autofocus (AF-C) if your camera has it. This will help track the butterfly as it moves. Also, pre-focus on a spot where you expect the butterfly to land. Be patient and anticipate their movements. A little practice will go a long way in capturing those elusive, sharp shots. Understanding the best Blue Morpho camera settings is important, but anticipation and timing are crucial too.
Question No 3: What lens is best for photographing Blue Morphos?
Answer: A macro lens is ideal for capturing the intricate details of Blue Morphos. A 100mm macro lens is a great choice. It lets you get close without disturbing the butterfly. If you want to photograph them from a distance, use a telephoto lens. A 200mm or 300mm lens will work well. Choose a lens that suits your shooting style and the environment. With practice, you can master the art of photographing these stunning creatures with any lens.
Question No 4: How important is lighting when photographing Blue Morphos?
Answer: Lighting is extremely important. Soft, diffused light is best. This avoids harsh shadows and glare. Shoot during the golden hours (early morning or late afternoon). Or, use a diffuser to soften the light. Pay attention to the direction of the light. Side lighting can create interesting shadows. Backlighting can create a halo effect. Experiment with different lighting conditions to see what works best. Remember, proper lighting can enhance the colors and details of the Blue Morpho.
Question No 5: Can I use flash to photograph Blue Morphos?
Answer: Using flash can be tricky. Direct flash can create harsh shadows and glare. It can also scare the butterfly. If you must use flash, use a diffuser. This will soften the light. Or, use an external flash. Bounce the light off a nearby surface. This will create a more natural look. Be careful not to startle the butterfly. Respect their habitat. Consider using natural light instead of flash whenever possible. Correct Blue Morpho camera settings can help you avoid using flash.
Question No 6: What post-processing techniques are useful for enhancing Blue Morpho photos?
Answer: Post-processing can greatly enhance your Blue Morpho photos. Adjust the exposure, contrast, and white balance. Sharpen the image to bring out details. Remove any distractions, such as dust spots. Correct lens distortion and chromatic aberration. Use selective adjustments to enhance specific areas. Be careful not to over-edit the photos. The goal is to enhance the natural beauty of the butterfly. The right editing can make your photos truly stunning. Understanding the best Blue Morpho camera settings beforehand will make post-processing easier.


