Macro Insect Identification Photography: Ultimate Guide
Quick Summary: Macro insect identification photography involves capturing detailed, close-up images of insects to aid in their identification. This requires specialized equipment like a macro lens or close-up filters, careful attention to lighting and focus, and a systematic approach to documenting key features. With the right techniques, you can create stunning images that help identify and appreciate the intricate details of these fascinating creatures.
Have you ever tried to identify a tiny insect in your garden, only to be frustrated by its size and intricate details? It’s a common challenge for nature lovers! Trying to capture those details with a regular camera is nearly impossible. But don’t worry, there’s a solution! With macro insect identification photography, you can reveal the hidden world of insects and easily identify them.
This guide will walk you through the steps to take stunning macro photos that highlight key identifying features. We’ll cover everything from choosing the right equipment to mastering focus and lighting. Get ready to unlock a new level of appreciation for the tiny creatures around us!
Understanding Macro Insect Photography
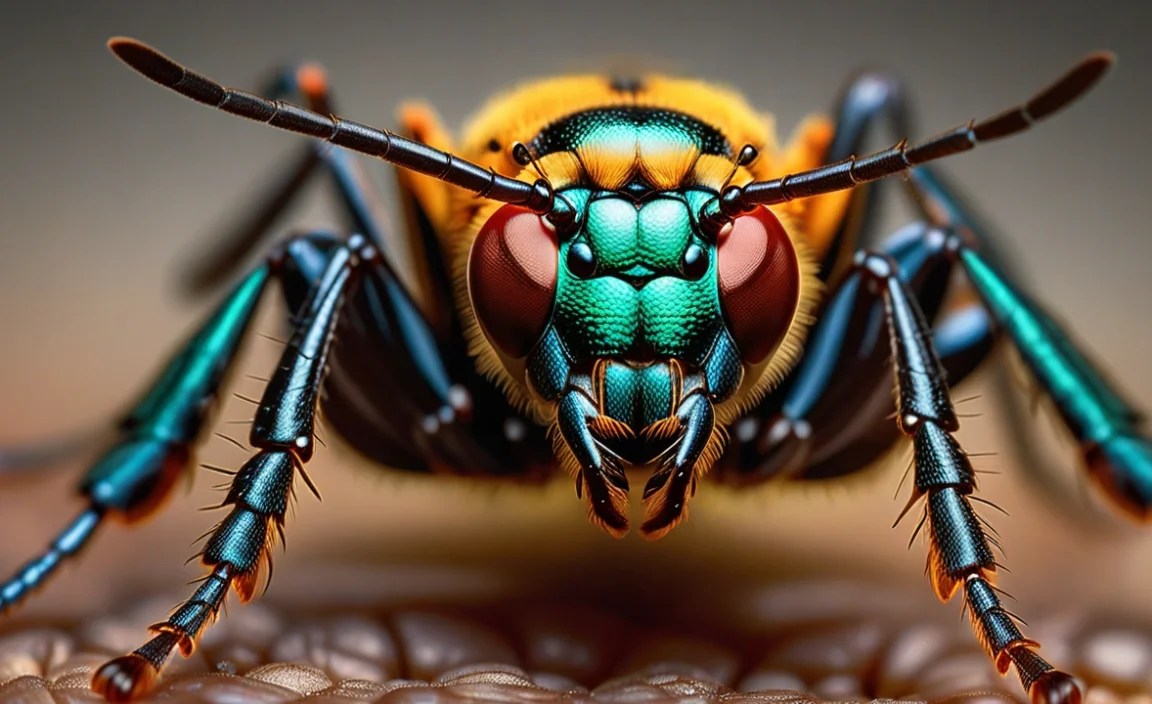
Macro photography is about capturing images where the subject appears life-size or larger on your camera’s sensor. This allows you to see details that are normally invisible to the naked eye. In the context of insect identification, this means capturing the intricate patterns, colors, and structures that differentiate one species from another. This technique is not just about taking pretty pictures; it’s about creating a valuable tool for scientific observation and documentation.
But why is macro photography so important for insect identification? Insects are incredibly diverse, and many species look very similar at first glance. Macro photography allows you to zoom in on the fine details, such as the number of segments in an antenna, the patterns on their wings, or the shape of their legs. These characteristics are crucial for accurate identification.
Benefits of Macro Insect Identification Photography
- Accurate Identification: Capturing detailed images helps in identifying insects accurately, reducing guesswork and potential misidentification.
- Documentation: Macro photos serve as a visual record of insect species in a particular area, contributing to biodiversity studies and conservation efforts.
- Education: Sharing macro images can educate others about the diversity and beauty of insects, fostering appreciation and interest in entomology.
- Personal Enjoyment: The process of capturing and studying macro images can be a rewarding hobby, deepening your connection with the natural world.
Essential Equipment for Macro Insect Photography

To get started with macro insect identification photography, you’ll need some specialized equipment. Here’s a breakdown of the essential gear:
1. Macro Lens
A true macro lens is designed to achieve a 1:1 magnification ratio, meaning the image projected onto the sensor is the same size as the subject. Macro lenses are available in various focal lengths, each with its own advantages:
- 50mm-60mm: These are typically more affordable and versatile, suitable for general photography as well as macro. They require you to get closer to the subject, which can be challenging with skittish insects.
- 90mm-105mm: These are a good balance between working distance and portability. They offer more space between you and the subject, making it easier to photograph insects without disturbing them.
- 150mm-200mm: These provide the greatest working distance, allowing you to photograph insects from further away. They are ideal for capturing images of elusive or dangerous species.
2. Camera Body
While a dedicated macro lens is crucial, the camera body also plays a role. Any DSLR or mirrorless camera can be used for macro photography, but some features can be particularly helpful:
- High Resolution: A camera with a high megapixel count will capture more detail, which is essential for macro photography.
- Image Stabilization: Built-in image stabilization can help reduce camera shake, especially when shooting handheld.
- Live View: Live view mode allows you to magnify the image on the LCD screen for precise focusing.
3. Lighting
Proper lighting is essential for macro photography. It can be challenging to get enough light on your subject without casting harsh shadows. Here are some lighting options:
- Natural Light: Diffused natural light is often the best option. Overcast days or shaded areas provide soft, even lighting.
- Ring Flash: A ring flash attaches to the front of your lens and provides even illumination with minimal shadows.
- Twin Flash: Twin flashes offer more control over the direction and intensity of light.
- LED Lights: Continuous LED lights are a good option for video and can also be used for still photography. Look for lights with adjustable brightness and color temperature.
- Diffusers and Reflectors: These tools can help soften harsh light and fill in shadows.
4. Tripod
A sturdy tripod is essential for keeping your camera steady, especially when shooting at high magnifications or in low light. Look for a tripod with:
- Adjustable Height: The ability to adjust the height of the tripod is important for shooting insects at different levels.
- Low-Angle Capability: Some tripods allow you to position the camera very close to the ground, which is useful for photographing insects on plants or in the soil.
- Ball Head: A ball head allows you to quickly and easily adjust the camera’s position.
5. Accessories
In addition to the essential equipment, there are several accessories that can make macro insect photography easier and more enjoyable:
- Remote Shutter Release: This allows you to trigger the camera without touching it, reducing camera shake.
- Focusing Rail: A focusing rail allows you to make fine adjustments to the camera’s position, which is essential for precise focusing in macro photography.
- Insect Net: Useful for safely capturing insects for closer examination.
- Magnifying Glass: Helps in initial identification and observing details in the field.
| Equipment | Description | Benefits |
|---|---|---|
| Macro Lens | A lens designed for close-up photography with a 1:1 magnification ratio. | Allows for capturing intricate details of insects. |
| Camera Body | DSLR or mirrorless camera with high resolution and image stabilization. | Provides sharp, detailed images and reduces camera shake. |
| Lighting (Ring Flash, Twin Flash, LED Lights) | Various lighting options to illuminate the subject evenly. | Ensures proper exposure and reduces harsh shadows. |
| Tripod | A sturdy tripod with adjustable height and low-angle capability. | Keeps the camera steady for sharp images, especially in low light. |
| Remote Shutter Release | A device to trigger the camera without touching it. | Reduces camera shake for sharper images. |
Step-by-Step Guide to Macro Insect Identification Photography

Now that you have the necessary equipment, let’s dive into the step-by-step process of capturing stunning macro insect photos for identification.
Step 1: Finding Your Subject
The first step is to find insects to photograph. Here are some tips for locating them:
- Gardens: Gardens are a great place to find a variety of insects, especially those that are attracted to flowers.
- Parks: Parks offer a diverse range of habitats, from meadows to forests, each with its own unique insect species.
- Woodlands: Woodlands are home to many insects that live on trees, shrubs, and leaf litter.
- Water Sources: Ponds, streams, and puddles attract insects that need water to drink or breed.
- Specific Plants: Learn which plants attract specific insects. For example, milkweed is a favorite of monarch butterflies.
Step 2: Approaching Insects Carefully
Insects are easily startled, so it’s important to approach them carefully. Here are some tips:
- Move Slowly: Avoid sudden movements that could scare the insect away.
- Approach from the Side: Approaching from the side is less threatening than approaching from the front.
- Use a Telephoto Macro Lens: A longer focal length allows you to photograph insects from a greater distance.
- Be Patient: Wait for the insect to become comfortable with your presence before taking photos.
Step 3: Setting Up Your Camera
Once you’ve found your subject, it’s time to set up your camera. Here are the basic settings to start with:
- Shooting Mode: Aperture Priority (Av or A) mode allows you to control the depth of field.
- Aperture: Start with a narrow aperture (e.g., f/8 to f/16) to maximize depth of field. You may need to adjust this depending on the lighting conditions and the size of the insect.
- ISO: Keep the ISO as low as possible (e.g., ISO 100 or 200) to minimize noise. Increase the ISO only if necessary to maintain a fast enough shutter speed.
- Shutter Speed: The shutter speed should be fast enough to prevent motion blur. A good starting point is 1/100th of a second or faster.
- Focus Mode: Use manual focus for precise control over the focus point.
- Image Stabilization: Turn on image stabilization if your lens or camera has it.
- White Balance: Set the white balance to “Auto” or choose a preset that matches the lighting conditions (e.g., “Sunny” for daylight, “Cloudy” for overcast skies).
Step 4: Mastering Focus
Focus is critical in macro photography. Because of the shallow depth of field, only a small portion of the image will be in focus. Here are some tips for achieving sharp focus:
- Manual Focus: Switch your lens to manual focus and use the focusing ring to fine-tune the focus point.
- Live View: Use live view mode to magnify the image on the LCD screen and check the focus.
- Focus Peaking: Some cameras have a focus peaking feature that highlights the areas of the image that are in focus.
- Focusing Rail: Use a focusing rail to make precise adjustments to the camera’s position.
- Focus Stacking: If you need more depth of field, consider using focus stacking. This technique involves taking multiple images with different focus points and then combining them in post-processing.
Step 5: Optimizing Lighting
Proper lighting is essential for capturing details and creating visually appealing images. Here are some tips for optimizing lighting:
- Natural Light: Shoot in diffused natural light whenever possible. Overcast days or shaded areas provide soft, even lighting.
- Diffuser: Use a diffuser to soften harsh sunlight. You can buy a commercial diffuser or make your own using a piece of translucent fabric.
- Reflector: Use a reflector to bounce light back onto the subject and fill in shadows. A piece of white cardboard or aluminum foil can be used as a reflector.
- Flash: If you need to use flash, use a ring flash or twin flash to provide even illumination. Adjust the flash power to avoid overexposing the image.
- LED Lights: Continuous LED lights are a good option for providing consistent lighting. Look for lights with adjustable brightness and color temperature.
Step 6: Composition and Framing
Composition is the arrangement of elements within the frame. Here are some tips for creating compelling compositions:
- Rule of Thirds: Place the insect along one of the lines or at one of the intersections of the rule of thirds grid.
- Leading Lines: Use lines to guide the viewer’s eye to the subject.
- Symmetry: Look for symmetrical patterns in the insect’s body or surroundings.
- Background: Choose a background that complements the subject and doesn’t distract from it.
- Angle: Experiment with different angles to find the most interesting perspective.
Step 7: Capturing Identifying Features
When photographing insects for identification, it’s important to capture key features that can help distinguish one species from another. These features may include:
- Antennae: The shape, size, and number of segments in the antennae.
- Wings: The patterns, colors, and venation of the wings.
- Legs: The number of legs and the shape of the feet.
- Body Shape: The overall shape and proportions of the body.
- Coloration: The colors and patterns on the body, wings, and legs.
- Mouthparts: The shape and structure of the mouthparts.
Take multiple photos from different angles to capture all of these features. If possible, capture dorsal (top), lateral (side), and ventral (bottom) views.
Step 8: Post-Processing
Post-processing is an important part of macro insect photography. Here are some adjustments you can make in post-processing software like Adobe Lightroom or Photoshop:
- Exposure: Adjust the exposure to brighten or darken the image.
- Contrast: Adjust the contrast to increase the difference between light and dark areas.
- Highlights and Shadows: Adjust the highlights and shadows to recover details in overexposed or underexposed areas.
- White Balance: Fine-tune the white balance to correct any color casts.
- Sharpening: Sharpen the image to enhance details.
- Noise Reduction: Reduce noise in high-ISO images.
- Cropping: Crop the image to improve the composition.
- Cloning and Healing: Remove any distractions, such as dust spots or blemishes.
| Step | Description | Tips |
|---|---|---|
| Finding Your Subject | Locate insects in gardens, parks, woodlands, and near water sources. | Learn which plants attract specific insects. |
| Approaching Insects Carefully | Move slowly and approach from the side. | Use a telephoto macro lens to maintain distance. |
| Setting Up Your Camera | Use Aperture Priority mode and adjust aperture, ISO, and shutter speed. | Start with a narrow aperture (f/8 to f/16) and low ISO. |
| Mastering Focus | Use manual focus and Live View for precise control. | Consider using a focusing rail or focus stacking. |
| Optimizing Lighting | Shoot in diffused natural light or use a diffuser and reflector. | Use a ring flash or twin flash for even illumination. |
| Composition and Framing | Use the rule of thirds, leading lines, and consider the background. | Experiment with different angles for interesting perspectives. |
| Capturing Identifying Features | Capture key features like antennae, wings, legs, and body shape. | Take multiple photos from different angles. |
| Post-Processing | Adjust exposure, contrast, white balance, sharpening, and noise reduction. | Crop the image to improve composition and remove distractions. |
Tips and Tricks for Better Macro Insect Photos

Here are some additional tips and tricks to help you capture even better macro insect photos:
- Shoot in RAW Format: Shooting in RAW format preserves more data than JPEG, giving you more flexibility in post-processing.
- Use a Beanbag: A beanbag can be used to support your camera when shooting at low angles.
- Clean Your Lens: Dust and dirt on your lens can affect the sharpness of your images. Use a lens cloth to keep your lens clean.
- Learn Insect Behavior: Understanding insect behavior can help you anticipate their movements and capture better photos.
- Practice Regularly: The more you practice, the better you’ll become at macro insect photography.
- Join a Photography Community: Sharing your photos and getting feedback from other photographers can help you improve your skills.
- Protect the Environment: Be mindful of the environment and avoid disturbing insects or their habitats.
Identifying Insects from Your Macro Photos
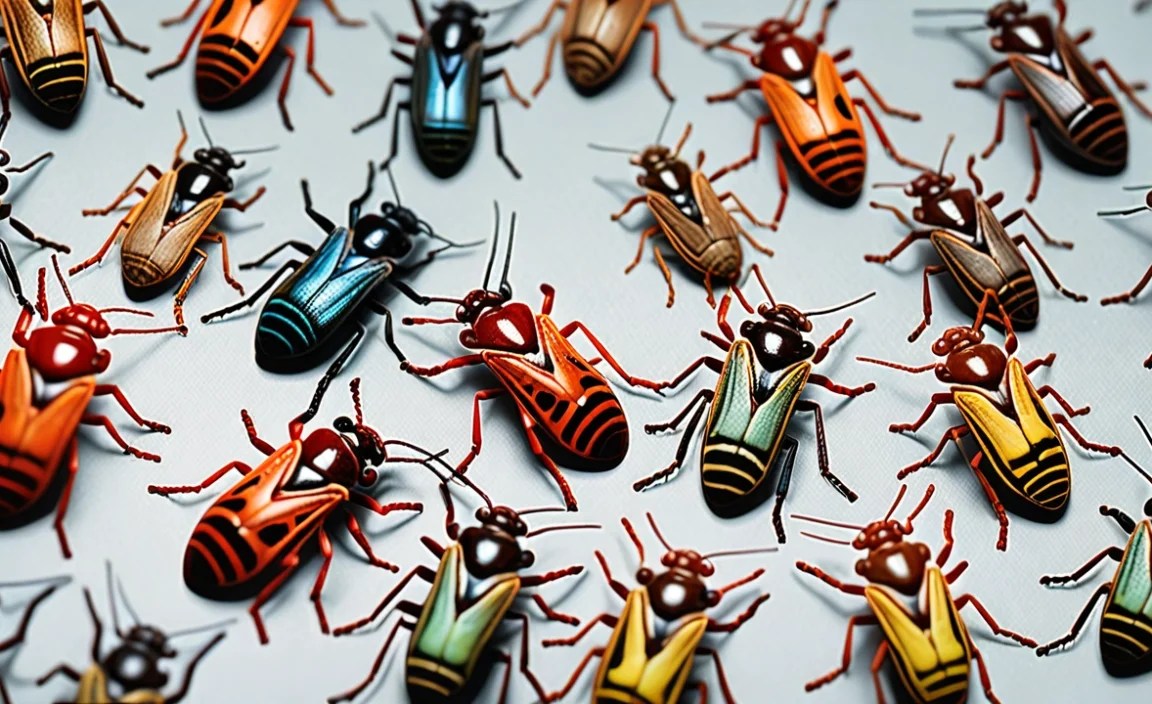
Once you’ve captured your macro photos, the next step is to identify the insects. Here are some resources that can help:
- Insect Identification Guides: Field guides and online resources can help you identify insects based on their physical characteristics. Some popular guides include the Kaufman Field Guide to Insects of North America and the Peterson Field Guide to Insects.
- Online Forums: Online forums and social media groups dedicated to insect identification can be a great place to get help from experts and other enthusiasts.
- Entomologists: If you’re having trouble identifying an insect, consider contacting an entomologist at a local university or museum.
- Bug Identifier Apps: Use apps like iNaturalist or Picture Insect to identify insects using image recognition technology.
- Museum Collections: Visit natural history museums and observe insect collections to learn identification techniques.
When identifying insects, pay close attention to the key features you captured in your macro photos, such as the shape of the antennae, the patterns on the wings, and the number of legs. Compare these features to the descriptions and images in your identification resources.
FAQ: Macro Insect Identification Photography
Here are some frequently asked questions about macro insect identification photography:
What is the best lens for macro insect photography?
The best lens depends on your budget and preferred working distance. A 90mm or 105mm macro lens offers a good balance between working distance and portability. A 150mm or 200mm lens provides even more working distance, which is useful for photographing skittish insects.
Do I need a special camera for macro photography?
No, you don’t need a special camera. Any DSLR or mirrorless camera can be used for macro photography. However, a camera with a high megapixel count and image stabilization can be helpful.
How do I get sharp focus in macro photography?
Use manual focus and live view mode to fine-tune the focus point. A focusing rail can also be helpful for making precise adjustments to the camera’s position. Consider focus stacking if you need more depth of field.
How do I light my macro insect photos?
Shoot in diffused natural light whenever possible. Use a diffuser to soften harsh sunlight and a reflector to fill in shadows. If you need to use flash, use a ring flash or twin flash to provide even illumination.
What settings should I use for macro insect photography?
Use Aperture Priority (Av or A) mode and start with a narrow aperture (e.g., f/8 to f/16). Keep the ISO as low as possible (e.g., ISO 100 or 200) and use a shutter speed that is fast enough to prevent motion blur (e.g., 1/100th of a second or faster).
How do I identify insects from my macro photos?
Use insect identification guides, online forums, and bug identifier apps to identify insects based on their physical characteristics. Pay close attention to key features such as the shape of the antennae, the patterns on the wings, and the number of legs.
What is focus stacking, and why is it useful?
Focus stacking is a technique where you take multiple images of the same subject with different focus points and then combine them in post-processing. This increases the overall depth of field, ensuring more of the subject is in sharp focus. It’s particularly useful in macro photography due to the shallow depth of field.
Conclusion
Macro insect identification photography is a rewarding and educational hobby that allows you to explore the hidden world of insects and contribute to scientific knowledge. By using the right equipment, mastering focus and lighting, and capturing key identifying features, you can create stunning images that help you identify and appreciate these fascinating creatures. So grab your camera, head out into nature, and start capturing the beauty of the insect world!


